Viewing Slides
1. Navigating to a Slide
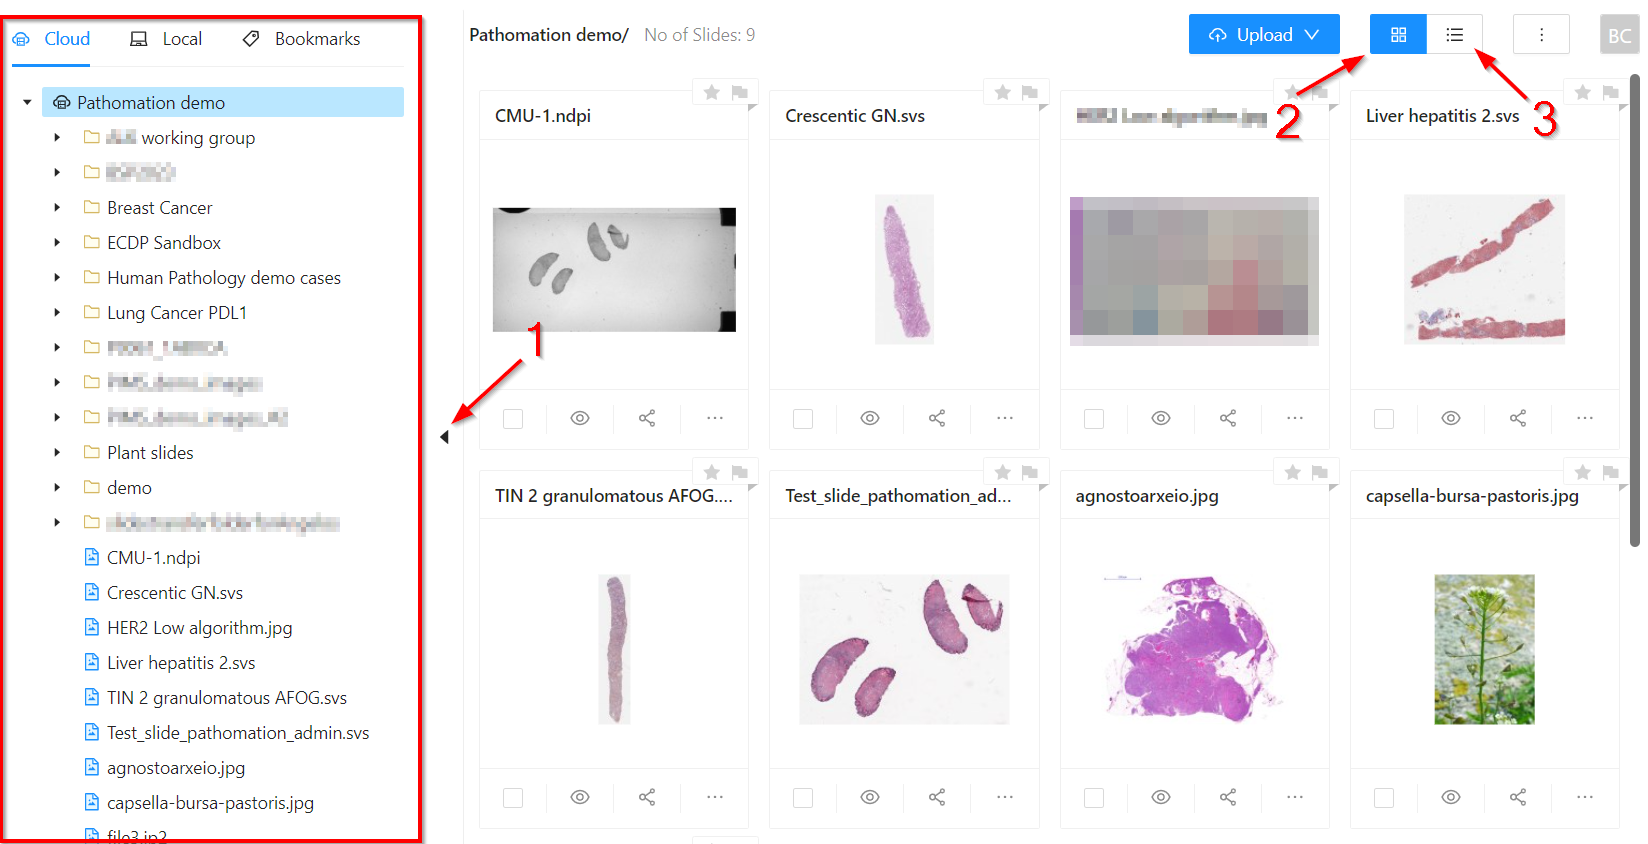
You can navigate slides already uploaded to the cloud and those stored on your local machine via the file tree on the left of the page (red box). Clicking on a folder in the file tree will display all the slides it contains in the main viewport. The file tree can be collapsed to free up more space to view your slides (1). You can choose to view your slides in gallery (2) and list (3) arrangements.
Swapping between list and gallery slide views:
2. Viewing a Single Slide
To view an individual slide in the viewport, click the eye button underneath that slide. The eye icon is used throughout Pathomation software to (pre)view content.
3. Exploring a Slide
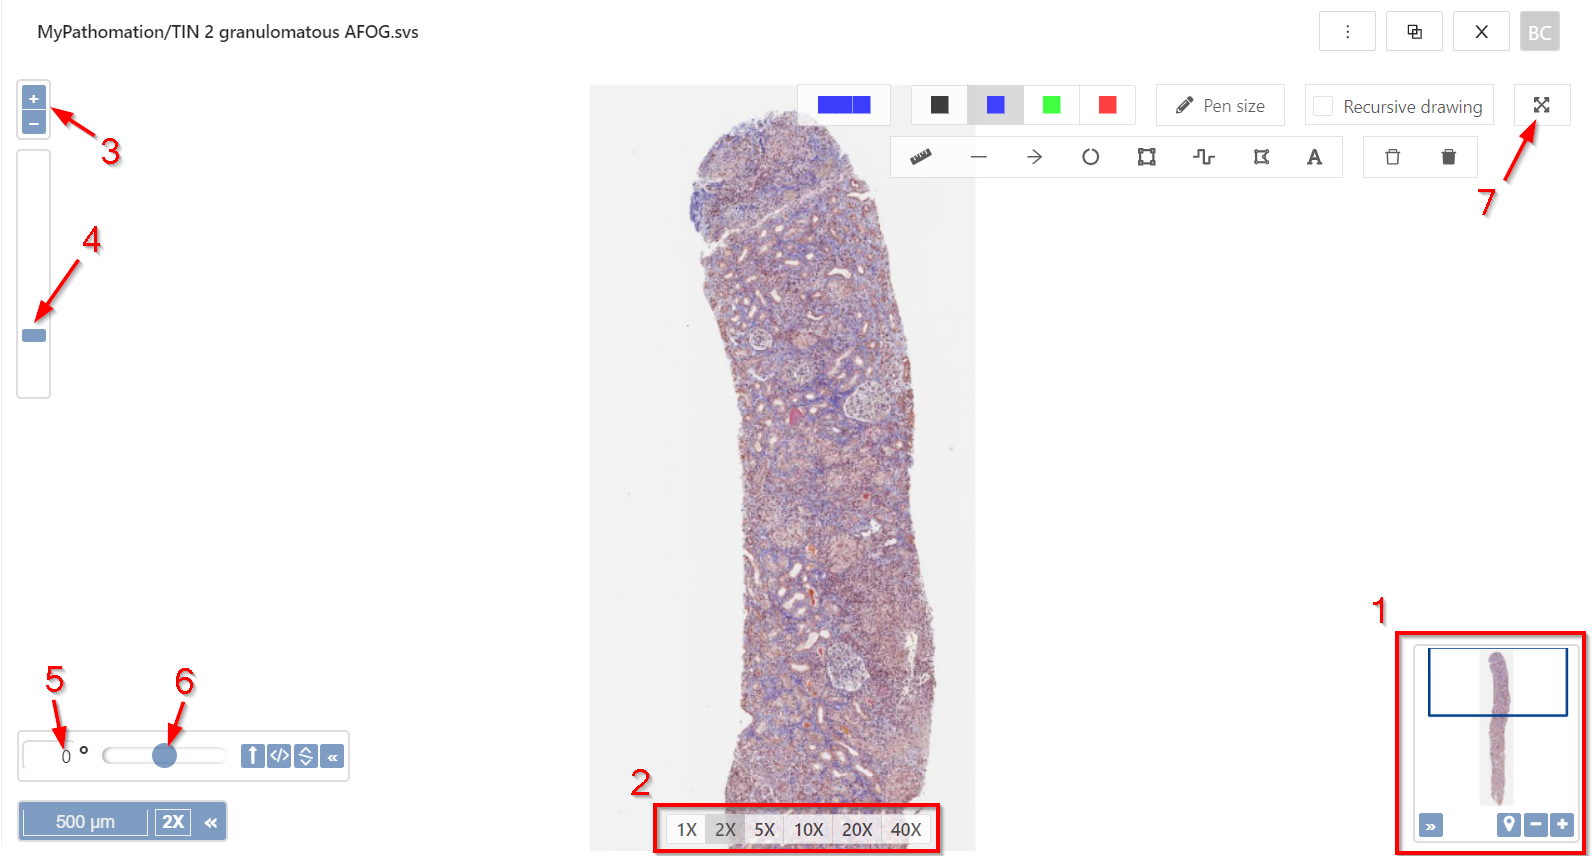
Once in the viewport, you can navigate around the slide by clicking and dragging on the image, using the arrow keys, or clicking a point in the slide overview panel (1). You can change magnification levels by scrolling with your mousewheel, selecting the magnification level (2), via the zoom slider by clicking the ‘+’ and ‘-‘ symbols (3) or clicking and dragging the blue bar indicating the current magnification level (4). You can rotate the image by specifying the degrees (5), dragging the rotation slider (6), or holding Alt+Left mouse and dragging the slide. For maximum viewing space, click the fullscreen icon (7).
4. Viewing Multiple Slides
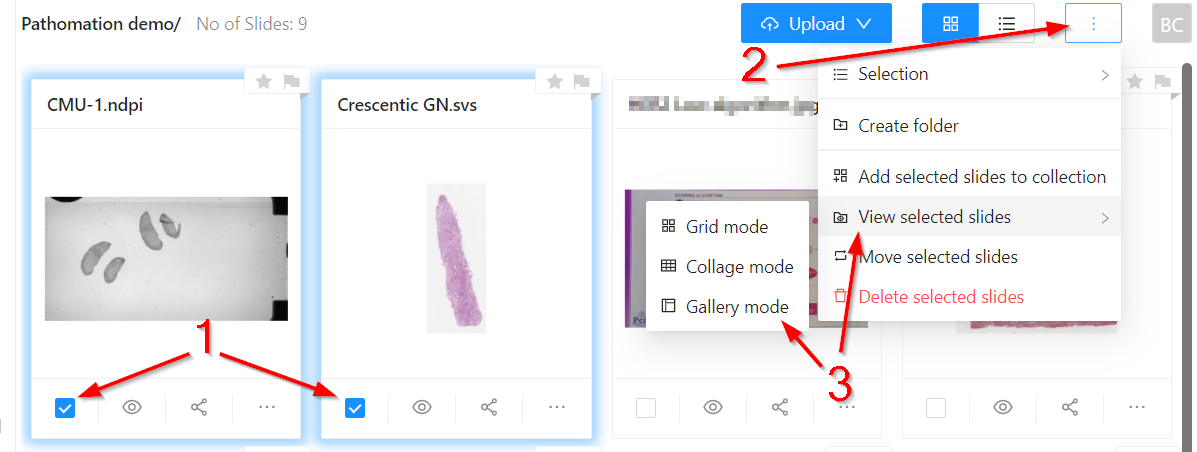
To view multiple slides at once side by side, click the checkboxes on two or more slides (1), then click the extra options button (2), and select how you would like to view the selected slides (3).
Multiview from list view:
You can navigate slides individually in multiview, or in sync as demonstrated in the video below:


