Upgrading Your Account
Whether you're looking for more cloud storage beyond the free 10GB, you want to expore featuring fully interactive slides embedded in course / exam content, or you need to collaborate with others through an organisation, it's time to upgrade your account.
In this video above, you'll learn how to upgrade your plan for your Personal Workspace and/or Organisation account.
1. Selecting the workspace
You can manage the plans for your personal workspace and your organisation(s) separately.
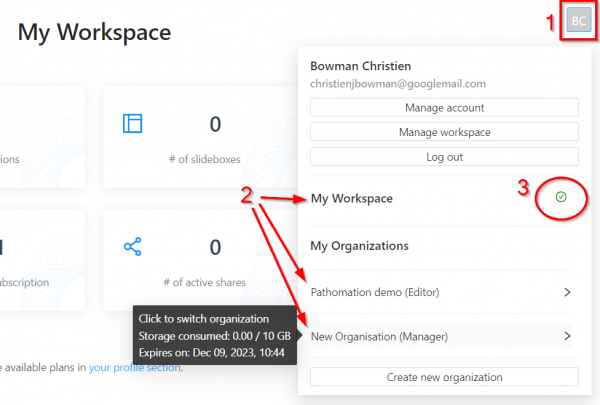
First select the workspace you want to manage by clicking the account button with your initials in the top right of the screen (1).
Then select your personal account (My Workspace) or one of your Organisations (2). If you hover your mouse over the organisation, details about it will pop out in the black speech box.
You can confirm which workspace/organisation you are currently in by looking for the green check mark (3)
2. Managing your workspace
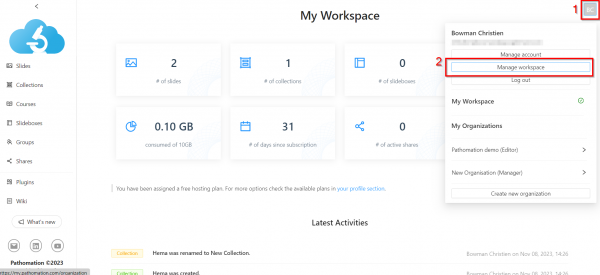
Now you are in the correct workspace, it's time to upgrade! First navigate to the account drop down menu by clicking the account button (1).
Then select “Manage Workspace” (2)
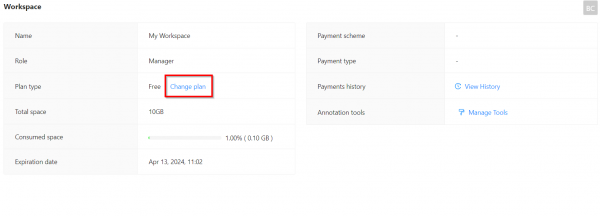
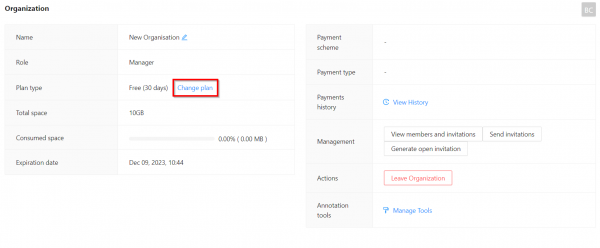
You will see the option to “Change Plan” in the “Plan Type” section. Click on the bluetext to see the account options. Here's how it looks for My Workspace:
Here's how it looks for an Organisation - note that you need to create your organisation first before you can upgrade from the free 30 day plan to a paid plan. In case your free plan has expired when you login the software will bring you direct to the payment options. You will also see the remaining days of your organisation's 30 day trial in parentheses here:
3. Choosing your plan
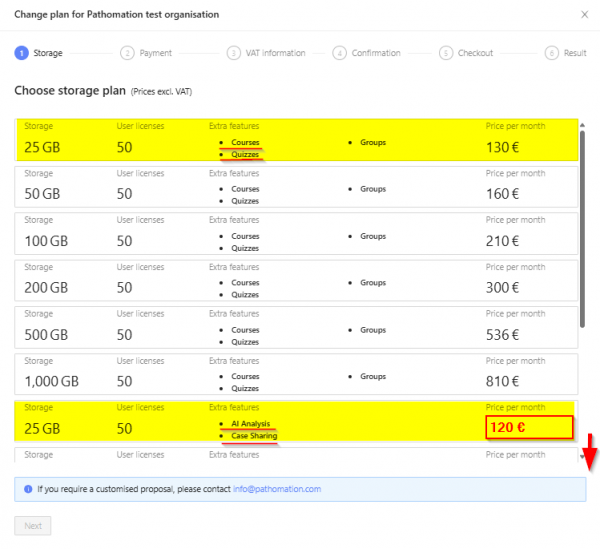
In the next window you will be presented with the storage options. Scroll all the way down to see all options.
Contact us in case you don't find the plan matching your needs info@pathomation.com
