User Tools

Site Tools


how_to_make_a_course

How to Make a Course

The Courses option allows you to build content consisting of interactive images and text that can be shared with students or collaborators.
You will need to be in an organisation to create a course, but you can access any courses that are shared with you.

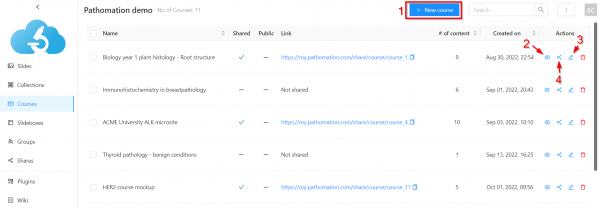
You can begin creating a new course by clicking the “+New course” button (1).
After the course is created you can add/edit the content by opening the edit panel (2).
You can preview the course content you have created by clicking (3).
You can share a course in the same way as you can images or collections by clicking (4).

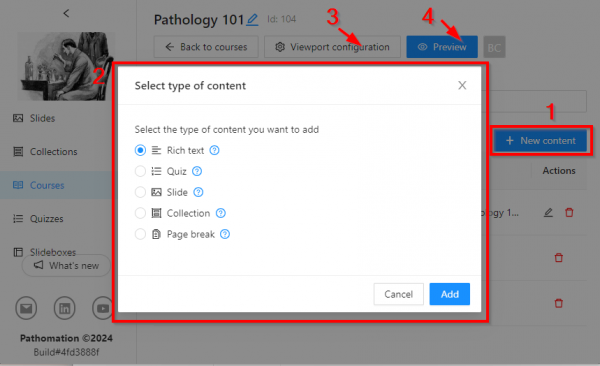
Below is the editor window.
Clicking 'New Content' (1), will prompt you to select which type of content you want to add (2)
Opting for Slide or Collection allows you to pick any of your available slides.
You can configure what users following the course will be able to see via the viewport configuration button (3). Here you can choose what elements of the user interface (zoom, rotation etc.) and slide details (filename, barcode etc.) will displayed to students.
You can preview the course with the preview button (4).

Sharing Courses

Please note that you can share a course with anyone, whether they are inside or outside of your organisation or not.
However, a Quiz in your course will only be visible to members of your organisation.
This is because quizzes require user credentials to record an individual's answers and prevent multiple attempts with dummy accounts.

how_to_make_a_course.txt · Last modified: 2024/02/21 15:33 by chris