Sidebar
This is an old revision of the document!
User management
PMA.core works with user accounts. Users can be marked as “Administrative”, in which case they can log into PMA.core directly and administer settings for themselves and for others.
Users that do not have the “Administrative” flag checked, cannot access PMA.core directly; they interface with root-directories and other PMA.core content via downstream applications like PMA.slidebox, PMA.studio, or PMA.control. In specific scenarios, you can use these to emulate service accounts.
This section discusses how users can be managed within System users can be managed by selecting the “Users” option from the left menu.
Overview
You can access user management in PMA.core by either clicking on the menu option in the left navigation bar:
Or by clicking on “Manage users” from the dashboard:
Either option takes you to an overview table that comprises all currently registered users:
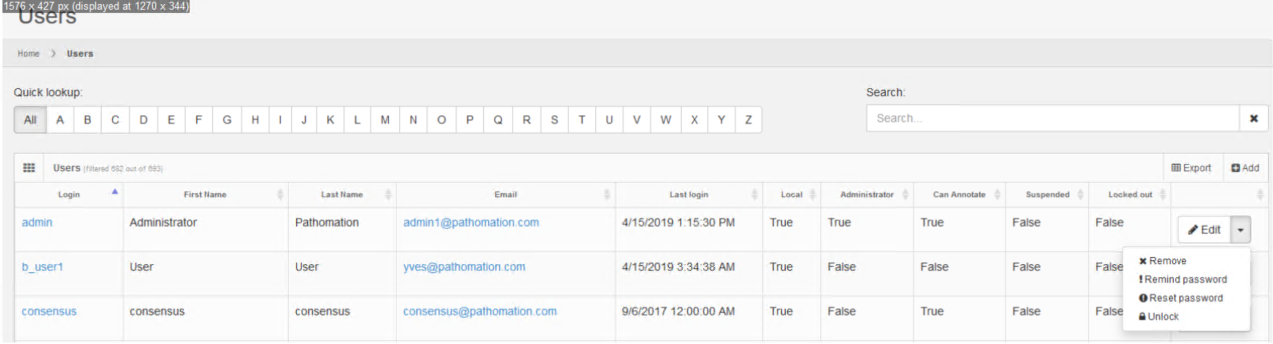
Clicking on a user name takes you to a detail view where you can find out lots more information about the account, as well as find out what they've been up to.

- The “Last login” column displays each user's last successful login date.
- The “Local” column indicates whether or not a user is managed by PMA.core or LDAP.
- The “Administrator” column indicates whether or not a user can access PMA.core. Non administrator users cannot perform system management tasks within PMA.core.
- The “Can Annotate” column indicates whether or not a user is allowed to create and edit annotations.
- The “Suspended” column indicates whether or not a user is currently allowed to login to either PMA.core or downstream applications. A suspended login is treated as invalid by the system.
- The “Locked out” column indicates whether or not a user is currently locked out due to consecutive invalid log in attempts.
- Clicking on a user's email address launches your default email client.
- Clicking on a user's login name displays a summary of the user's activity.
Next to each entry the following buttons appear:

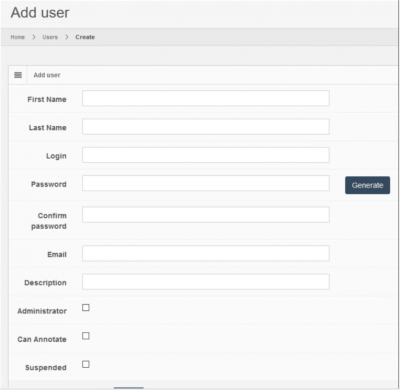
To add a user click on the “Add” button on the top right of the table.

The following fields can be defined for each user: