Sidebar
Table of Contents
Root directory configuration
Each root directory is given an alias by which it is referred. The alias must be unique, irrespective of its casing. This means that if you have a root directory with an alias “RoOt”, you cannot also have another root directory with a alias “rOoT”.
Apart from its alias, the root directory needs at least one mounting point.
All other configuration options described in this page are optional.
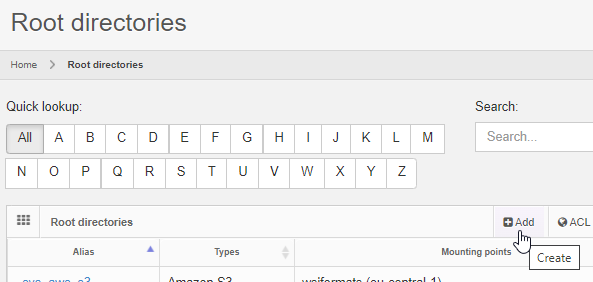
Defining your root directory
You add a new root directory by clicking on the “Add” button from the root directory overview page:
Next, you fill out the general characteristics for the root-directory. Don't worry about filling out details like C:\slides references yet. We'll take care of that later when we talk about mounting points.
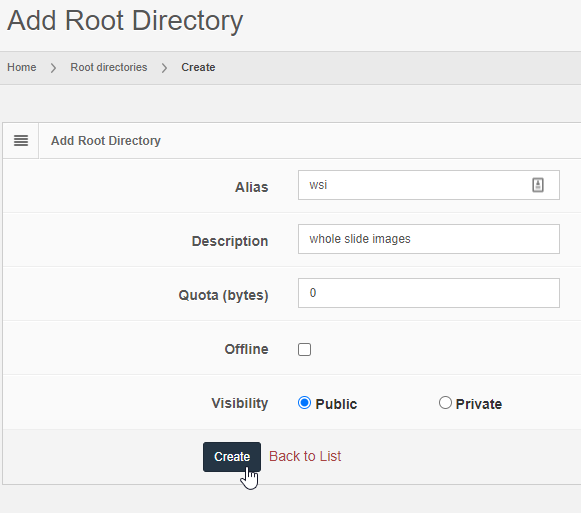
You must enter a unique name (“Alias”) for the root directory.
The following parameters are available for further tweaking:
| Parameter | Meaning |
|---|---|
| Description | An aribitrary string that can help administrator in the future remember what your root directory is actually about. The Description field of a root directory can also be used to hide additional information about a group of data that you don't want everybody to know about immediately. Do not use this field for sensitive information, as it can be seen by everyone with access to PMA.core. If you're an instructor working with students e.g., it's perfectly ok to enter reminders for yourself in this field like “these are all trick-questions”… |
| Quota | You can set a limit on the amount of data that you want to allow PMA.core to manage in a particular for. This can be useful when facilitating temporary workers, visiting staff, residents or other students that only will be at your department for a brief period of time. If you don't want to restrict the amount of data, you can leave the default value of 0 in place. |
| Offline | When checked, the folder will not be available to downstream applications like PMA.studio. Maybe you're just creating a placeholder for a future department, or you're not done curating a new collection yet. Instructors can also use this option to prepare a list of exam slides and only expose them to students for a limited amount of time (we don't offer scheduling though; you're still going to have to flick the proverbial switch manually) |
| Visibility | See our section on security |
Once you create your root directory, you will see a reminder that you still need to provide a mounting point.
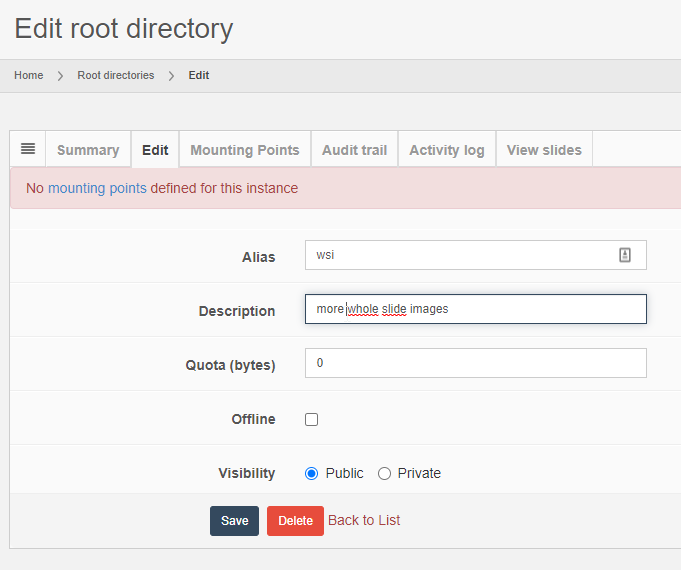
Clicking on the suggestion takes you to the Mounting Points tab, which is empty by default.
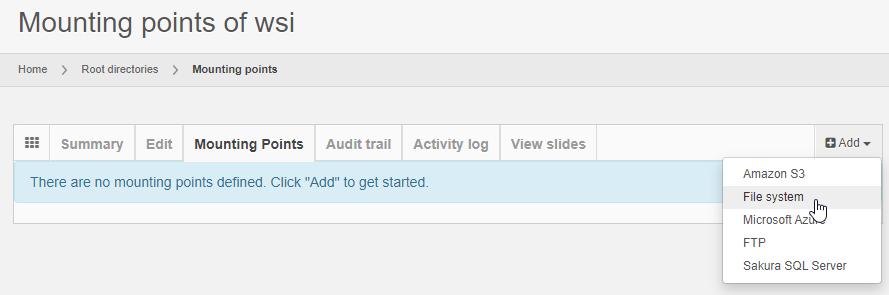
Now it's time to tell PMA.core where the content actually lives that you want the root directory to refer to.
Adding mounting points
PMA.core supports different types of storage (see also our press release):
| storage type | information needed |
|---|---|
| local hard disk | a path reference like c:\my_slides or e:\department\pathology\staff\dr_seuss. Note that you cannot map network drives (drive letters like Y: or Z: are usually network drives) as root directories this way. |
| network drives | a UNC path reference like \\server\sharename\our_slides (more about networks). |
| S3 storage | Access and secret key combination, a path to a bucket like /my_bucket. Sub-paths underneath this path are allowed, too. |
| Azure storage | A connection string, container name. As of PMA.core 2.0.1, you can also specify a path to traverse directly down a hierarchy within the container |
| FTP server | FTP server URL, username and password, optionally an initial path |
For some of these storage types, you'll also see a field “Chunk size”. This has to do with caching and can almost always be left to its default setting.
In our section on security, we elaborate more on each storage type.
Nested references
Two root-directories are nested if one is contained within another one. There are very good reasons to have this kind of setup: you can have a folder d:\projects\ with over 100 different subdirectories, but only two or three of those are actually of importance to you at any given time. Nevertheless you may still need to consult occasionally some of the other projects as well, so you really need the following setup:
- One root-directory “projects” pointing to d:\projects
- Two other root-directories “project_foo_004” (project 4 for customer foo) and “project_bar_045” (project 45 for customer bar) that offer you quick access to the files in d:\projects\foo\p0004 and d:\projects\bar\p0045.
It is clear that d:\projects\qcor\p0004 is a subdirectory of d:\projects and as such qualifies as a nested directory.
Whether you want to actually allow this is up to you. In PMA.core, the files will be mapped to different locations and therefore will be accessible through different routes. Therefore, we recommend disabling nested root-directories if you plan to do any of the following:
- Move files to other locations using the image manager
- Capture on-slide annotations
- Capture form-data
Nested root-directories are fine to use, as long as you only use PMA.core to host and view WSI content.
Control nesting
The following operations should only be performed by experienced users. If you don't know where or how to find a file called App_Data\Data\PMACore.config, you should stop reading and contact somebody more knowledgeable in this area.
Assuming that you know what you're doing; you can control whether nested root-directories are allowed by modifying the AllowNestedRootDirectories switch in PMACore.config:

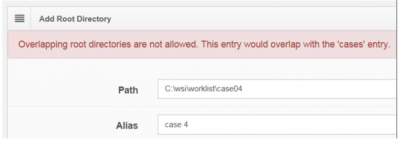
Appropriate error handling is provided. Say that you have the following situation:
- AllowNestedRootDirectories is set to false
- A root directory
casesexists and points toc:\wsi\worklist\ - A subdirectory exists
c:\wsi\worklist\case04\
When trying to map c:\wsi\worklist\case04 to a separate root directory, an error message shows: